Redecorating your home can be a real hassle, especially when those pesky wall anchor holes refuse to go away. But fear not, there’s a genius trick that can make those unsightly blemishes vanish in no time. With a few simple steps, you can restore your walls to their former glory and create a seamless, polished look that will impress your guests.
Whether you’re swapping out artwork, rearranging furniture, or just giving your space a fresh new vibe, dealing with those stubborn anchor holes can be a real headache. But with the right approach, you can say goodbye to those pesky reminders of your past decorating decisions and start with a clean slate.
Why Brute Force Turns Wall Anchor Holes into a Disaster
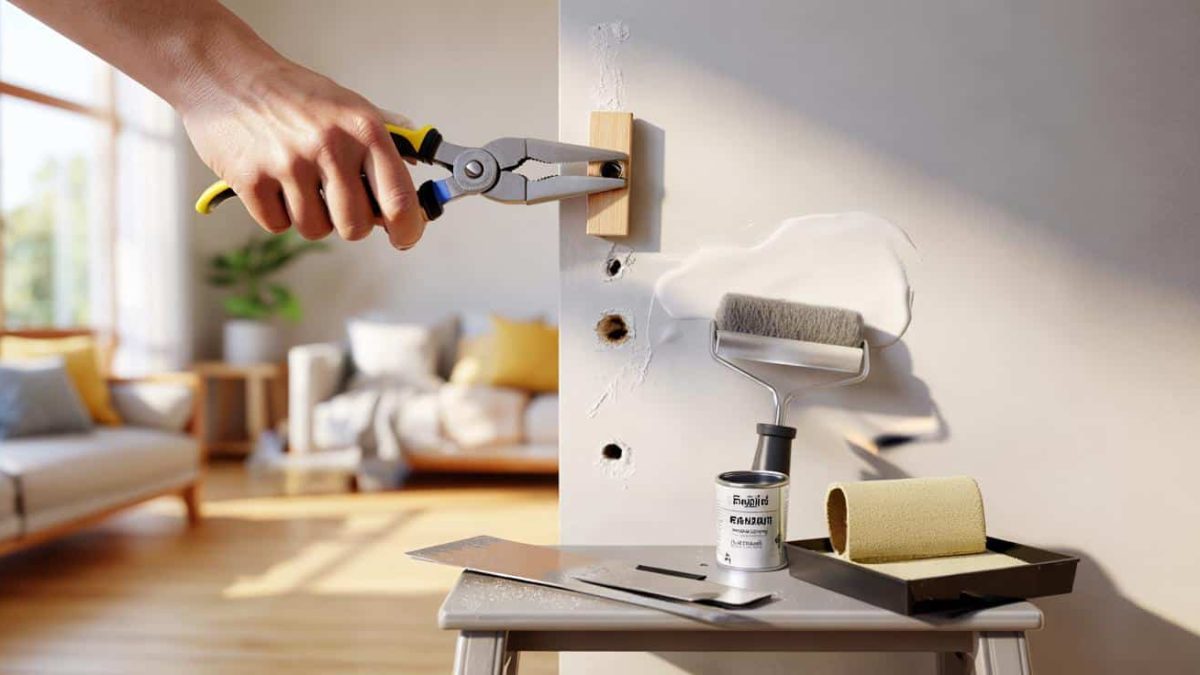
When you remove a wall anchor, it’s tempting to simply yank it out and call it a day. But this heavy-handed approach can often lead to bigger problems. The anchor hole left behind can be ragged, uneven, and even cause damage to the surrounding drywall. This not only makes it harder to repair, but it can also create an eyesore that’s challenging to camouflage.
Rather than relying on raw power, it’s important to approach the task with the right tools and a gentle touch. By using the proper technique, you can ensure that the anchor hole is clean, smooth, and ready for a seamless repair job.
- ➡Frische Farbe am Gartentor? Diese teure Regel trifft Hausbesitzer 2026
- ➡Alpine Legend Luc Alphand: Why His Children Have Different Passports
- ➡Wochenlange Verdächtigungen gegen den Fuchs: Video enthüllt überraschenden Eier-Dieb
- ➡Schluss mit wackeligen Tomatenstäben: Diese platzsparende Hängemethode sorgt für stabilen Halt
Patience and a strategic mindset are key when it comes to tackling those pesky wall anchor holes. With a little know-how, you can transform your walls from a patchwork of unsightly blemishes to a pristine, uniform surface.
The Right Tools: No Need for Professional-Grade Machinery
You don’t need to be a seasoned handyman to tackle this task. In fact, you can achieve professional-looking results with just a few simple tools that you probably already have in your toolbox. A screwdriver, a putty knife, and some sandpaper are all you need to get the job done right.
The key is to approach the anchor hole with a delicate touch, gently working the screwdriver to loosen the anchor and carefully removing it. Once the anchor is out, use the putty knife to smooth out any rough edges or protruding fragments. Finally, a quick sanding session will leave the wall surface perfectly primed for the next step.
By taking this methodical approach, you can ensure that the anchor hole is left clean and ready for a seamless repair, without causing any additional damage to the surrounding drywall.
- ➡Genialer Trick: Mit einem Küchenprodukt riecht dein WC wie im Hotel
- ➡Wie dieser orangefarbene Blütenstrauch jeden Mini-Garten größer erscheinen lässt
- ➡Preisschock an den Tankstellen: Dieses europäische Land senkt jetzt radikal die Spritsteuer
- ➡Der 10. März 2026: Ein astrologischer Wendepunkt, der das Glück für vier Sternzeichen verändert
The Lever Technique: Achieving the Perfect Grip
One of the most effective ways to remove a stubborn wall anchor is to use the lever method. Simply insert a screw into the anchor and use it as a handle to gently pry the anchor out of the wall. This allows you to apply steady, controlled pressure without resorting to brute force.
The key is to choose a screw that fits snugly into the anchor, providing a secure grip. Once the screw is in place, you can use a pair of pliers or even your fingers to carefully twist and pull the anchor out of the wall. This technique not only removes the anchor cleanly, but it also helps to preserve the integrity of the surrounding drywall.
By using the lever method, you can say goodbye to those unsightly anchor holes and start fresh with a smooth, blemish-free surface.
Professional Spackling: Ensuring a Lasting Repair
Once you’ve successfully removed the wall anchor, it’s time to tackle the repair process. While it may be tempting to simply fill the hole with spackle and call it a day, taking the time to do it right will ensure a lasting, invisible fix.
Start by applying a generous amount of spackling compound to the anchor hole, making sure to smooth it out flush with the surrounding wall surface. Allow the spackle to dry completely, then lightly sand the area to create a seamless transition. Finally, touch up the paint to match the existing wall color, and you’ll have a repair that’s virtually indistinguishable from the rest of the surface.
By following this professional-grade approach, you can transform those unsightly anchor holes into a seamless, invisible repair that will stand the test of time.
The Invisible Repair: Sanding and Color Matching
The final step in achieving a flawless wall repair is to ensure that the repaired area blends seamlessly with the surrounding surface. This is where sanding and color matching come into play.
After the spackle has dried, use a fine-grit sandpaper to gently smooth the surface, removing any bumps or unevenness. This will create a perfectly smooth transition between the repaired area and the rest of the wall.
- ➡Heizungsfehler im Frühling: Warum das komplette Abschalten teuer werden kann
- ➡Legale Tank-Trickkombi: So sparen Autofahrer jetzt jeden Monat bares Geld
- ➡Das Anti-Falten-Serum unter 10 Euro, das gerade für Furore sorgt
- ➡Hype Around Pharmacy Cream: Organic Anti-Aging with Top Ratings Smoothens Wrinkles from 30 Years Old
Next, carefully match the paint color to the existing wall. This may require a bit of trial and error, but with the right tools and a steady hand, you can achieve a near-perfect match. Once the paint has dried, you’ll be left with a repair that’s virtually invisible to the naked eye.
By taking the time to sand and color match, you can transform those unsightly anchor holes into a seamless, unified surface that will impress your guests and make your space feel like new.
Embracing Decor Opportunities: The Unexpected Benefits
While dealing with wall anchor holes can be a nuisance, it can also present unexpected opportunities to enhance your décor. By embracing this challenge, you can discover new ways to showcase your creativity and personal style.
For example, you might choose to hang a decorative mirror or a unique piece of artwork over the repaired area, turning a once-unsightly blemish into a focal point. Or, you could get creative with wall hangings, shelves, or other décor elements that can help conceal the repaired surface.
The key is to approach this task with a fresh perspective and an eye for design. By thinking outside the box, you can turn a seemingly mundane repair job into an opportunity to elevate the look and feel of your space.
Practical Additions for Common Problem Areas
While the genius trick of repairing wall anchor holes is a game-changer, there are some additional tools and techniques that can make the process even easier and more effective. Consider investing in a few practical accessories, such as a high-quality putty knife or a set of fine-grit sandpaper, to ensure a flawless finish.
Additionally, you may want to explore specialized products designed to tackle wall anchor holes, such as filler compounds or touch-up paints that are formulated to seamlessly blend with your existing wall surface. These can be especially useful in high-traffic areas or for larger anchor holes that require a more robust solution.
By arming yourself with the right tools and resources, you can approach wall anchor hole repairs with confidence, knowing that you have the means to transform your space into a polished, picture-perfect haven.
| Tool | Purpose |
|---|---|
| Putty Knife | Smoothing and shaping the spackle for a seamless finish. |
| Fine-Grit Sandpaper | Ensuring a perfectly smooth transition between the repaired area and the surrounding wall. |
| Filler Compound | Providing a robust and long-lasting solution for larger anchor holes. |
| Touch-Up Paint | Achieving a precise color match for a truly invisible repair. |
“The key to a successful wall anchor hole repair is to approach it with a meticulous, step-by-step process. By taking the time to do it right, you can transform your space and create a seamless, polished look that will impress anyone who steps through your door.”
– Sarah Greenwood, Interior Design Specialist
“Dealing with wall anchor holes doesn’t have to be a daunting task. With the right techniques and a bit of elbow grease, you can restore your walls to their former glory and make your space feel brand new.”
- ➡ADHS-Medikamente reduzieren offenbar das Risiko für Psychosen im späteren Leben
- ➡Wann sind wir wirklich erwachsen? Studie zeigt große Unterschiede zwischen Männern und Frauen
- ➡Nivea-Creme nur auf einer Gesichtshälfte: Was nach 7 Tagen passiert
- ➡Ramadan Together: How Star Chef Mohamed Cheikh Plans a Light Iftar
“The secret to a flawless wall anchor hole repair lies in the preparation. By taking the time to properly remove the anchor and clean the area, you set yourself up for a seamless, long-lasting fix.”
– Michael Simmons, Home Renovation Expert
“Don’t be afraid to get creative when it comes to concealing those pesky anchor holes. With a little imagination, you can turn a once-unsightly blemish into a focal point that enhances your overall décor.”
“The beauty of this genius trick is that it’s accessible to anyone, regardless of their DIY experience. By following a few simple steps, you can transform your walls and give your space a fresh, polished look.”
Also Read
- ➡Warum deine Gelenke im Herbst und Winter mehr schmerzen als im Sommer und was dahintersteckt
- ➡Alte Nähkästchen im Schrank: Warum sie heute ein lukratives Geschäft sind
- ➡15 langlebige Gartenstars, die deinen langweiligen Hof jetzt komplett verändern
- ➡290 Millionen Jahre altes „Kotz-Fossil” enthüllt uralten Superjäger
– Emma Lichtenberg, Home Improvement Blogger
Can I Use Spackle to Fill Wall Anchor Holes?
Yes, spackle is an excellent choice for filling wall anchor holes. Make sure to apply it in a thin, even layer and sand it down for a smooth finish before painting.
How Do I Match the Paint Color?
To match the paint color, bring a small sample of the existing wall paint to your local hardware store. They can help you find the closest color match for a seamless repair.
What If the Anchor Hole is Too Large?
For larger anchor holes, you may need to use a specialized filler compound or even a small piece of drywall to ensure a sturdy, long-lasting repair. Be sure to sand and paint the area to blend it in with the rest of the wall.
Can I Use a Power Tool to Remove the Anchor?
It’s generally best to avoid power tools when removing wall anchors, as they can easily damage the surrounding drywall. Stick to the gentle, manual techniques for the best results.
How Long Does the Repair Process Take?
The entire repair process, including removing the anchor, filling the hole, sanding, and painting, can typically be completed in an afternoon. Just be sure to allow sufficient drying time for each step.
Can I Paint Over the Repaired Area?
Yes, you can paint over the repaired area once the spackle or filler has dried completely. Make sure to use the same paint type (e.g., latex, oil-based) and color as the existing wall for a seamless finish.
What If I Can’t Find the Exact Paint Match?
If you can’t find an exact color match, try blending a small amount of the repair paint with the existing wall color. This can help create a more subtle, blended look that’s less noticeable.
- ➡Gefahr im Garten: Diese 3 Pflanzen locken ab März giftige Vipern an
- ➡Der neue China-Elektrokombi Zeekr 7 GT: Die Herausforderung für BMW und Audi
- ➡Neue Puma-Sneaker: Wie dieses Modell die klassischen weißen Turnschuhe verdrängt
- ➡Generation Z Übernimmt Führungspositionen – und Kritisiert plötzlich ihre Altersgenossen
How Can I Prevent Future Anchor Holes?
To avoid creating new anchor holes in the future, consider using command strips or other damage-free hanging solutions when rearranging your decor. This can help you maintain a clean, blemish-free wall surface.